Getting started
Pick how your phone will connect
You can switch later, and doing one does not stop you doing the other.
Install the app on your Mac
Two commands. The first brings the app, scrcpy and the pab command. The second brings adb, and is only needed if you do not already have the Android SDK.
The app checks for both when it launches and names anything missing, so there is nothing to get wrong here.
Unlock Developer options on the phone
Open Settings, then About phone. Find Build number at the bottom and tap it seven times.
It counts the last few taps down out loud, then tells you that you are now a developer. If it asks for your PIN, that is expected.
This does not change anything by itself. It only reveals a menu that was hidden.
Turn on USB debugging
Developer options now exists in Settings, usually under System. Open it and switch on USB debugging.
Leave it on. The bridge uses it every time it runs, so this is not a switch you flip once and turn back off.
Plug in and allow your Mac
Connect the cable. Your phone asks whether to trust this computer and shows a key fingerprint.
Tick Always allow from this computer so you are not asked again, then tap Allow.
Nothing was granted before this moment. The approval is what lets your Mac in, and it applies to that one Mac.
The computer's RSA key fingerprint is:
4A:E3:81:0C:9F:22:B7:D6
Open the app
That is the phone finished with. Launch Pixel Audio Bridge, put your headphones on, and play something.
Install the app on your Mac
Two commands. The first brings the app, scrcpy and the pab command. The second brings adb, and is only needed if you do not already have the Android SDK.
On this route adb does the pairing too, so the second command matters unless you already have the Android SDK.
Unlock Developer options on the phone
Open Settings, then About phone. Find Build number at the bottom and tap it seven times.
It counts the last few taps down, then tells you that you are now a developer. If it asks for your PIN, that is expected.
Turn on Wireless debugging
In Developer options, switch on Wireless debugging. This is a different setting from USB debugging, and on this route you do not need the USB one at all.
Your Mac and your phone have to be on the same network.
Run one command and read out the code
Open Wireless debugging, tap Pair device with pairing code, and leave that dialog on screen. Then on your Mac:
Homebrew puts pab on your PATH. From the disk
image it is /Applications/PixelAudioBridge.app/Contents/Resources/pab.
It finds your phone on the network, asks only for the six digit code, pairs, then looks up the separate port it needs to connect on and connects. You never type an address.
That matters because the pairing dialog and the Wireless debugging screen show different ports, and reusing the first one is the mistake almost everyone makes doing this by hand. It is looked up rather than typed, so it cannot happen.
If anything fails it says which of the usual causes fit, rather than printing an adb error and stopping.
Wi-Fi pairing code
Doing it by hand instead
Both values are on the pairing dialog:
Then connect using the address on the Wireless debugging screen itself, which is a different port:
Open the app
Launch Pixel Audio Bridge and it will find the phone you just connected. Put your headphones on and play something.
Wireless debugging resets when the phone reboots, so you will pair again after a restart. Pairing is remembered, so it is usually only the connect step.
What working looks like
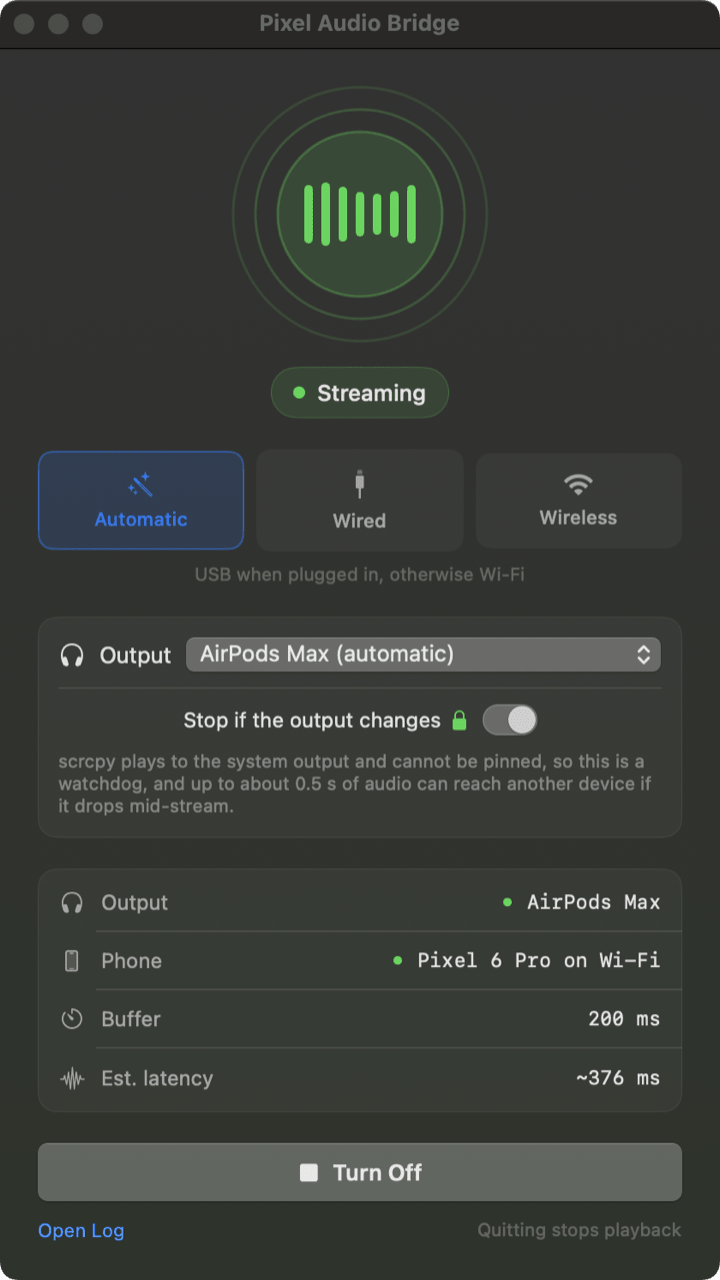
- The status reads Streaming with a green dot.
- Phone names your device and how it is connected.
- Output names the headphones you are wearing.
- Taking the headphones off stops it. Putting them back on starts it.
Closing the window does not stop playback. The app carries on from the menu bar, and quitting is what tears everything down.
The app cannot see the phone
Run adb devices. If it is empty, the phone has not authorised your Mac yet. Unplug and replug, and watch the phone for the prompt.
It says unauthorized
The prompt was dismissed. In Developer options, tap Revoke USB debugging authorizations, then reconnect and accept it.
Wi-Fi will not connect
Many guest and office networks isolate clients from each other, which blocks this outright. A home network or the phone's own hotspot works.
Anything else is on the troubleshooting page, and pab doctor reports every dependency, device and setting in one pass.